
Years and years ago, before the internet (yep, I'm that old), I came across a reference to a three needle bind off for seaming the shoulder stitches together. There were few instructions but I was intrigued. It seemed a little redundant to bind off shoulder stitches only to seam them together again. It made sense to do this as part of one step and this was what the three needle bind off promised. However, without instructions, I had to figure it out for myself but I quickly found juggling three needles awkward. There had to be a better way and so I set about devising a method that worked for me.
Enter the three needle bind off on two needles. I have been doing it this way for years but as yet have not come across anything similar in any book or article or tutorial. That's not to say someone else hasn't thought of it - surely, they have because it's so ridiculously simple - but then again, perhaps it's only me who needs such a technique because I'm super clumsy.
As I said above, juggling three needles just doesn't work for me. With this method on two needles, I still have to knit two stitches together (one stitch from each needle) but the trick is that the stitches are all on the same needle).
(For those not in the know, a three needle bind off requires the knitter to knit together two stitches - one from each needle - and then take the resulting first stitch on the right hand needle and pass over the second stitch. It is really just a simple bind off but instead of just knitting a stitch and passing one over, you knit two stitches together to form a single stitch.)
To do it with just two needles, a step is added before knitting: the secret is to take either a circular needle or double pointed needle, and slip the stitches that are to be bound off onto this needle, one at a time from each needle, that is, taking a stitch from the first needle, and then a stitch from the second needle, until all the stitches are on the circular needle. By using a circular or double pointed needle, if the yarn wasn't cut from one or either set of stitches, the needle can be turned around to enable you to start knitting where the yarn joins the stitches.
Hopefully a few photos will illustrate the concept but before we get to them, a few other tips. As in sewing when seaming knitted pieces together, place RIGHT sides together. Unless, of course, you want the seam on the outside of the garment, in which case, place wrong sides together. But generally, right sides will be placed together with the wrong side facing outwards.
The pieces in these photos were knit in stocking stitch (or stockinette as it's known in some parts of the world). The method also works with garter stitch but there is a simple little trick to avoid a row of stocking stitch showing up between the garter ridges. When joining two pieces together that are worked in garter stitch, finish one piece on a wrong side row, and one piece on a right side row. There will be one more row on one piece. Place with right sides together and work the same method as for stocking stitch. And if you have cables or colourwork, be prepared to be amazed at how beautifully the pattern lines up with this method.
And now to the method ...
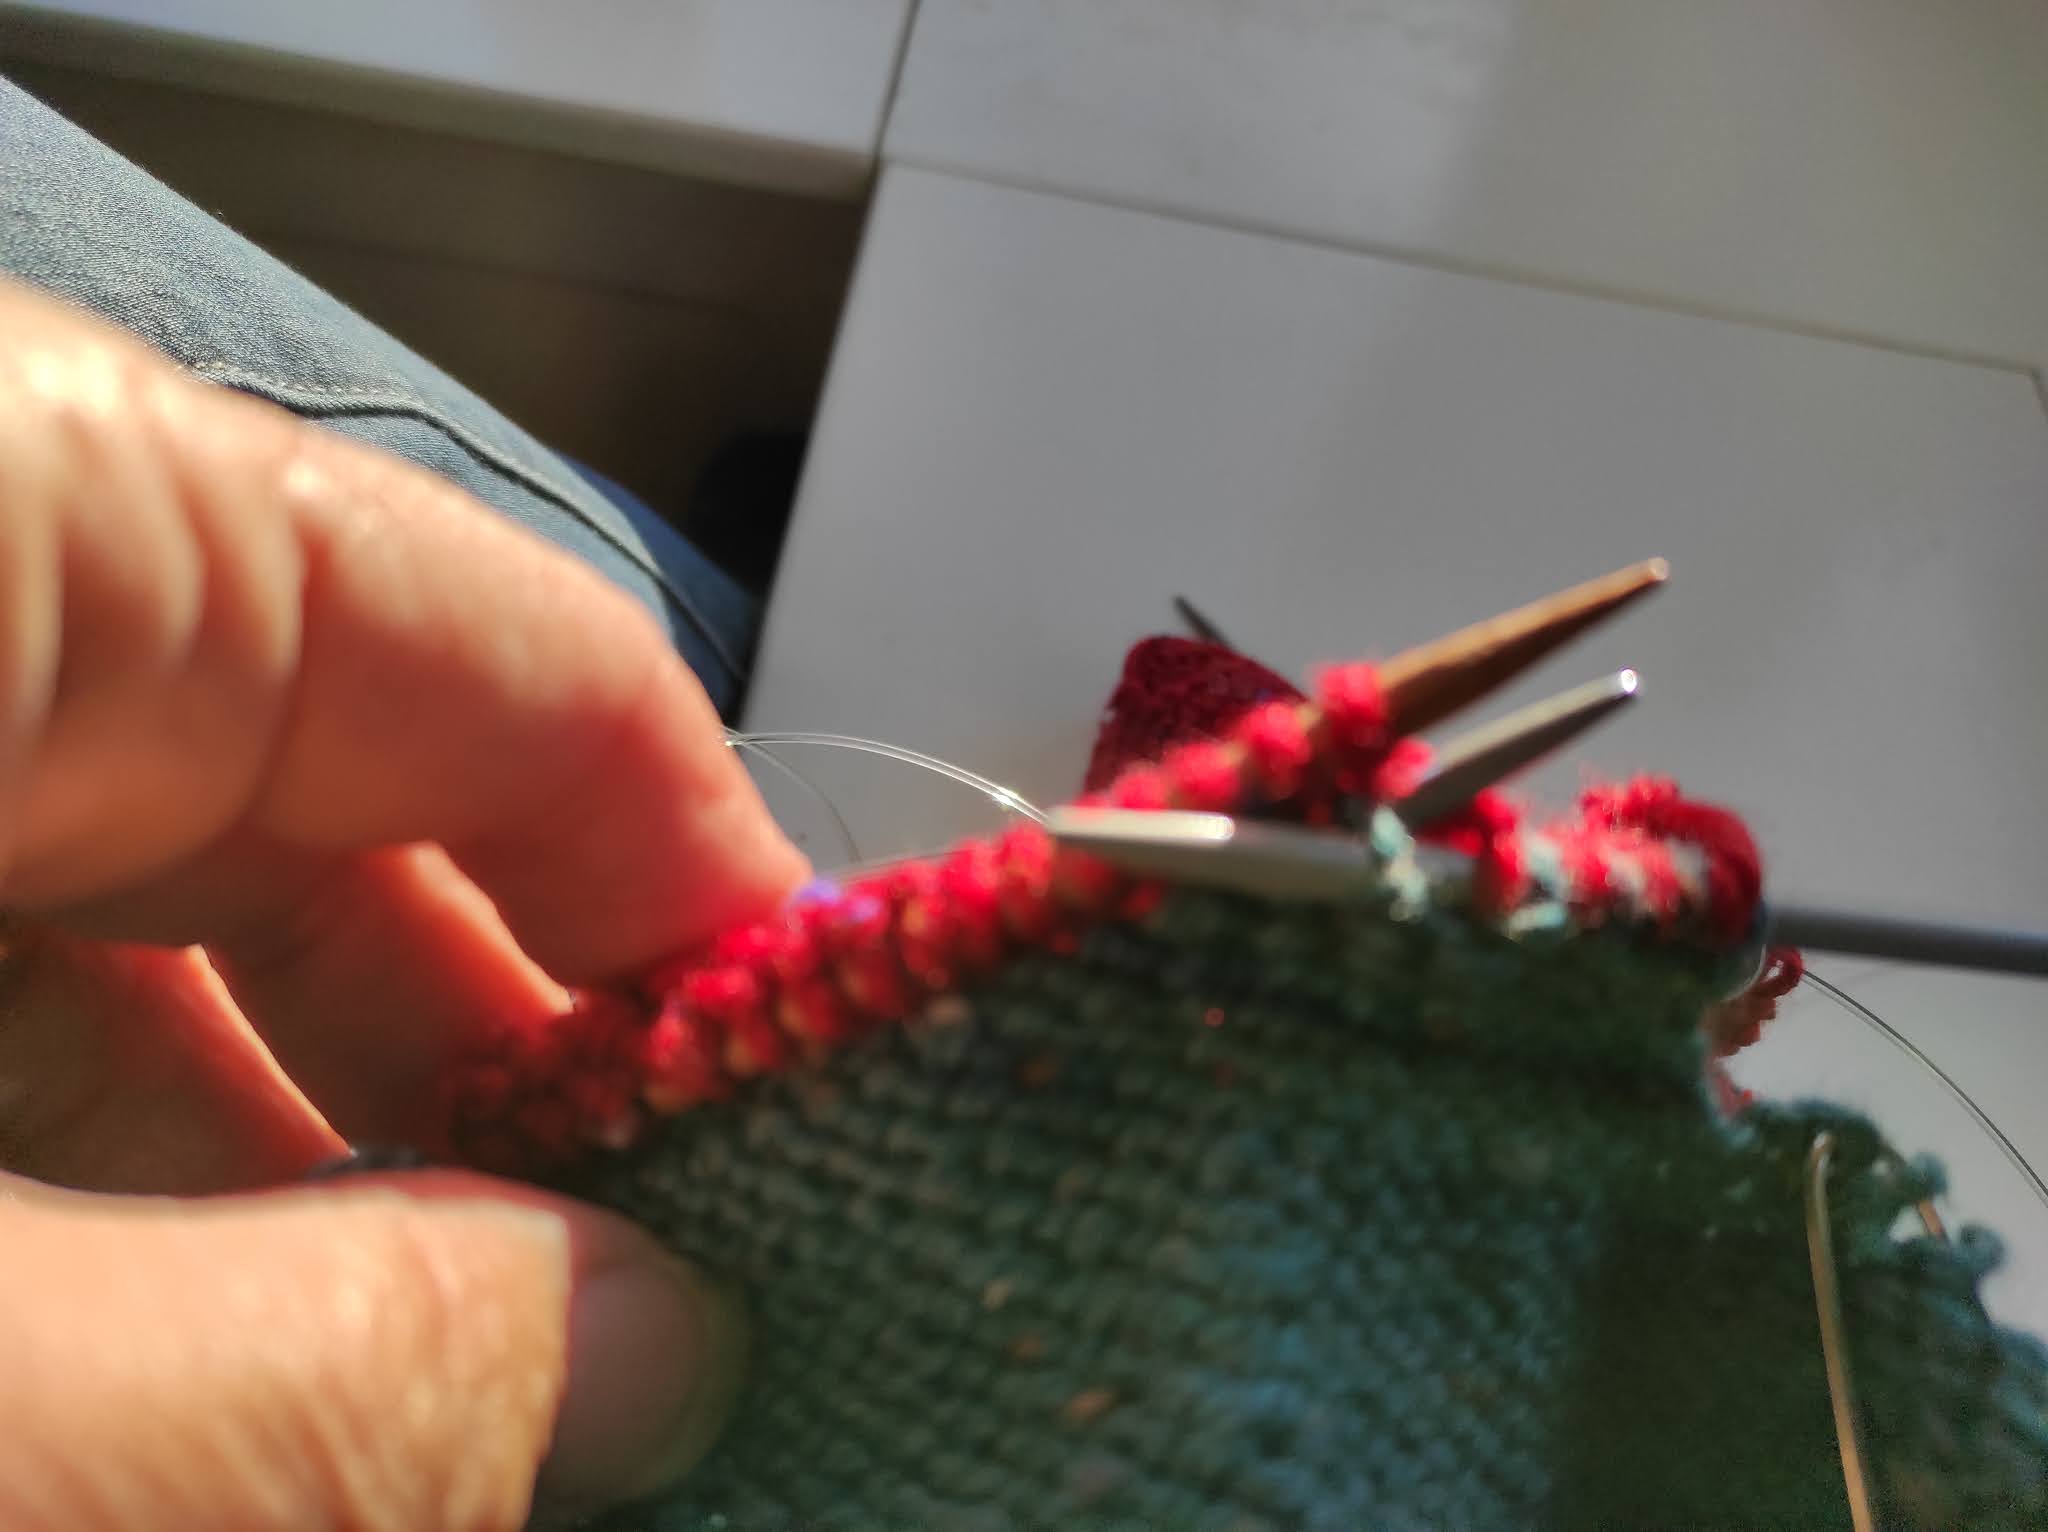
In this first photo, there are stitches from the blue piece and also from the red (not so easily seen because the fabric has curled over the needle and hidden the stitches) on separate needles to be bound off and seamed together.

Stitches from each piece are then slipped onto a circular needle:
Having two pieces different coloured yarns makes it easier to see how stitches from each needle are placed onto the one needle. (This project was Gingersnap for Bigger Kids which is ideal for showing this method):


Begin by knitting two together; do this again and then slip the first stitch that is now on the right hand needle over the second stitch:

Another example:


Comments